How to Prepare Your Garden for Winter
Tips for getting your plants and soil ready for winter to help prevent disease problems next season.
We’re near that time of year when the ground freezes and the gardening season comes to a close. There’s a common misconception that once you’ve hauled that final crop out of the ground or your flowers start to shrivel that it’s time to pack it in, resuming all growing activities once spring rolls around.
Not true! More seasoned growers will tell you that the steps and small details you pay attention to during the off-season will result in a garden with healthier soil, meaning fewer chances for disease-ridden plants and a more abundant harvest.
Now is the time to get your garden ready. To help, we’ve compiled a list of tips and tricks that will ensure your garden enters its prime once the ground thaws again and it’s time for roots and seeds to sprout.
Tend to your trees and shrubs
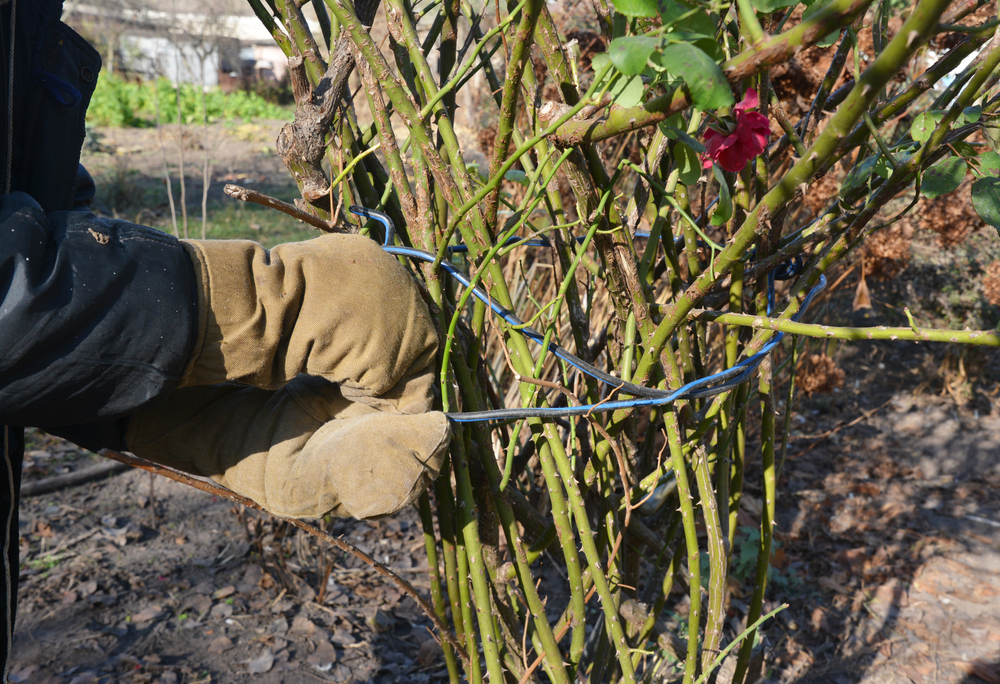
Before the fall of the first frost, give your trees and shrubs special attention. This includes a generous watering to ensure there’s moisture when you wrap them.
Wrapping your trees will protect them all winter from all the elements as well as any animals or pests. To wrap your trees and shrubs, we suggest using burlap. When you wrap your trees, you can attach the top of the material to a central branch of the tree with a clothespin. Start wrapping the burlap around the tree, down toward the ground. Cover around the truck and the lower branches.
You can retrace your wrapping path by going back up the tree and slightly overlapping the burlap. Cut your burlap and attach the end piece to a starting branch with a clothespin. Tie pieces of twine around the tree at the top, middle and bottom to secure the tree.
Remove excess vegetation
Eliminating any dead plants and rotting fruits and vegetables is a must. You don’t want any chance of future plant material getting infected or re-infected. This is especially important if any material is showing signs of disease, mildew, mold or blight. You can do this either by throwing it in the trash or burning it.
If the excess vegetation looks healthy, toss it in the compost bin. Pull out any remaining weeds and, if they look healthy, too, you can throw them in as well.
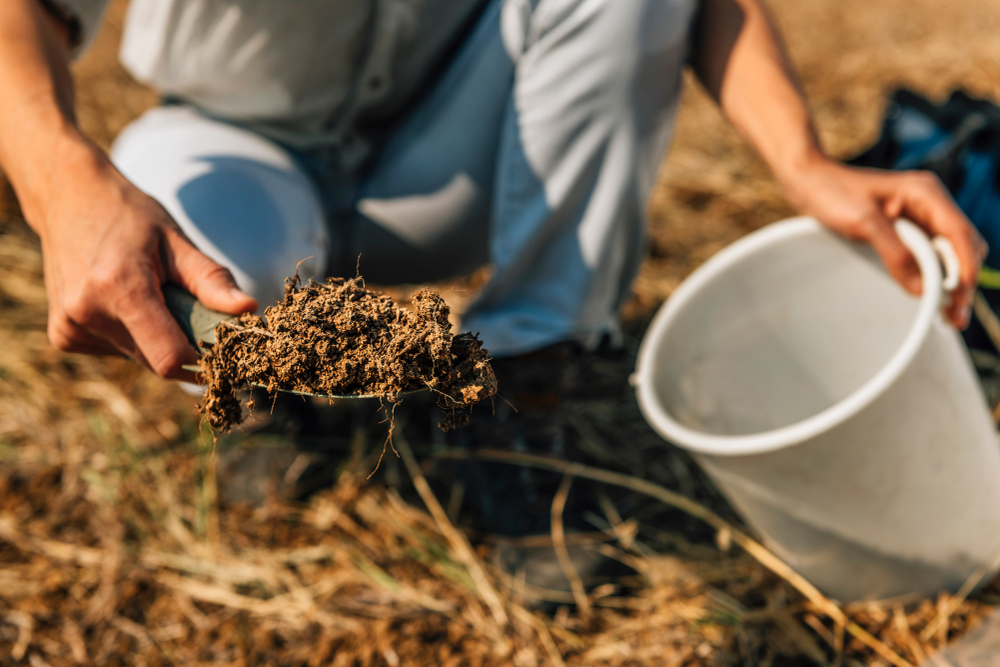
Check your soil
Healthy soil is the basis of healthy, nutrient-rich plants. It’s important to make sure the ground is in good shape before it gets tucked away under frozen ground and snow during the winter.
A soil test will help you determine soil pH levels, concentration of potassium, phosphorus, calcium, magnesium and sulfur, amount of organic matter and lead content. In other words, you’ll know whether or not you’ll need to add any sort of amendments going forward. A lot of gardeners will add lime, which provides a boost of calcium carbonate and magnesium carbonate and has all winter to dissolve into the ground.
Don’t know the process for testing your soil? Here’s our how-to that will help prime you on best practices before, during and after you take your samples.
Prep your perennials
Before the ground freezes, water your perennials to lock in moisture for the winter.
If you didn’t already clear out dead foliage from these long-hauling garden dwellers, now is the time. For perennial plants that have finished growing for the season, cut back their stems so they are about 3 to 4 inches from the ground. You want to leave enough so there’s material that can be sheltered in mulch and compost (see next step) once the ground freezes. If you need further guidance, check out this list of perennials to cut back.
There are certain perennial bulbs, such as dahlias, elephant ears and calla lilies that cannot survive winters in cold climates. For pretty much any tropical bulb variety that you’ve planted, carefully remove them from the ground and store in a safe, dry place.
For any newly planted perennials, in addition to creating a mulch and compost barrier around its crown (see below; once again, you may also want to think about building on this with chicken wire or tomato cages. You can stuff them with leaves, straw or another mulch for further protection). Again, it’s important to wait for the ground to freeze before doing this or else you can attract rodents who are looking for a cozy place to hibernate.
Lastly, if you have garlic, you can still plant it, but do it sooner rather than later! See our how-to on this for more information. You can also use this time to plant any other hardy fall bulbs. More information is available here if you’re not sure what to plant.
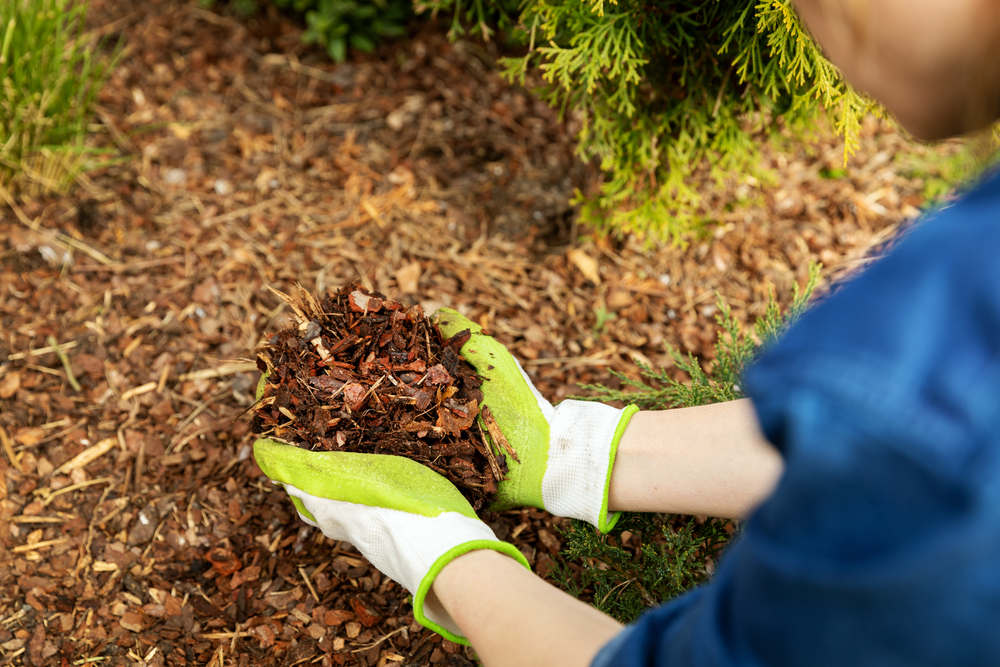
Add mulch and compost
Once you’ve removed all unwanted plant material and tended to what will remain in your garden over the winter, you can add a layer of compost. We suggest it be about 1-2 inches thick. This will allow your soil to soak up nutrients over the winter. We suggest adding another 1-2 inches of mulch over your compost, too. This will help prevent soil erosion, nutrient leaching and weed development. It also works as insulation, shielding soil from any ebbs and flows of thawing, freezing, sunshine and winds. When the soil is kept at a consistent, cool temperature, this also ensures everything in the garden stays in a dormant state.
If you have perennials in your garden, pack on another layer, about 2 inches thick, once the ground freezes. Materials such as shredded leaves, bark or wood chips, pine needles and straw are all good winter mulch choices. This added layer will help especially sensitive perennials and serve as a bigger buffer to snow.
Disinfect all gardening materials
Any seed trays, garden pots and other gardening equipment should be sanitized and disinfected. This is another necessary step to kill off any chance of mold or disease that could linger into the following season.
We suggest first getting rid of any remaining soil on materials. This may involve soaking them in soapy water and/or using a brush with tough bristles to scrub them.
Next, you’ll want to disinfect your containers and tools. We recommend using a mixture that’s one part bleach and nine parts water. Let your materials soak in this water for about 10 minutes. If you are resistant to the idea of using bleach, use a mixture of 2.5 parts water and 0.5 part hydrogen peroxide instead. For the latter option, let everything sit for 20 minutes.
If you have terra cotta containers, soak them afterwards in plain water for an additional 10 minutes to ensure no chemicals remain on them.
You can let all materials air dry before storing them away.
Time for reflection
You’ve done all the hard work, so now it’s time to take a moment to think about how this year went. Were there certain varieties that did or didn’t do well? Do you remember some of the problems you experienced? The most dedicated gardeners will take stock of the season and use their off time to research potential solutions or understand why things happened the way they did.
You should also use winter as time to plot your spring garden plan, developing a map of what to plant and where. That way, you’ll have ample time to source seeds and supplies.

I was surprised and upset to see a (stock) photo of red mulch (labeled on the bag) in your section above on winter preparation. The dye in red mulch leaches into the soil, along with other possible toxic contaminants, with serious possibilities for harming organisms. Certainly only clean natural mulch should be used?!
Nothing said about cover crops!
Just like pruning shrubs, take the opportunity to remove dead/sick tree limbs. Chip these branches into your beds to prevent erosion and once temps warm up in the Spring, sow directly into the decomposing chips. The slight heat being emitted from decomposition will incubate your seeds until it’s time to sprout!