How to Build a Brooder
Raising chicks is infinitely easier than incubating eggs, but there is still much more to it than just plopping them in a coop.
How to Build a Brooder
Raising chicks is infinitely easier than incubating eggs, but there is still much more to it than just plopping them in a coop.
Raising chicks is infinitely easier than incubating eggs, but there is still much more to it than just plopping them in a coop. They need a toasty-warm mini-coop – a brooder – to nurture them into toddlerhood. If they had a mother of their own, the chicks would crowd under her feathers at night for warmth, and she would show them how to forage and keep them safe by pecking viciously at any predator that came lurking. There are many ways to build a brooder, but they all have to fulfill the basic needs of an orphan chick for the first six weeks of its life: food, water, warmth and protection.
Step 1 – Build a Container
Build is a relative term here. Many people raise chicks in a cardboard box. Play pens, kiddie pools, rabbit hutches, aquariums, plastic totes and other items likely to be found in a garage, barn or basement will suffice. You can build a custom chick mansion with private bedrooms for each one if you want, but the general rule of thumb is to provide at least one square foot of space per chick. For the first few weeks a small fraction of that space is fine, so one option is to start small and add on later.
The container needs to be at least 12 inches tall for chicks in weeks one to three, but by the time they are six weeks old the walls should be 24 inches high to keep them from hopping out. Or, you can add a lid. A lid is a necessity if there are pets or other creatures that may pose a threat to your baby chicks. Chicks need fresh air, however, so the lid needs to be completely breathable – hardware cloth or window screen stapled to a wooden frame is an easy way to go.
The brooder needs to be out of the elements so the chicks are warm, dry and safe from nighttime predators. A barn, garage or your living room are all fine options. You can also place the brooder inside the chicks’ future home – the coop.
Step 2 – Outfit the Brooder
Pine shavings are the bedding of choice for baby chicks. The essential oils in cedar shavings can cause respiratory distress and newspaper is hard for them to walk on when they’re little.
Spread an inch or two of shavings on the floor of the brooder and set up a watering and feeding station at one end. There are various DIY options for chick waterers and feeders, but the basic models only cost a few bucks at the feed store. Nipple-style waterers are highly recommended because the chicks can’t foul them with feces – good hygiene is critical to keeping chicks healthy.
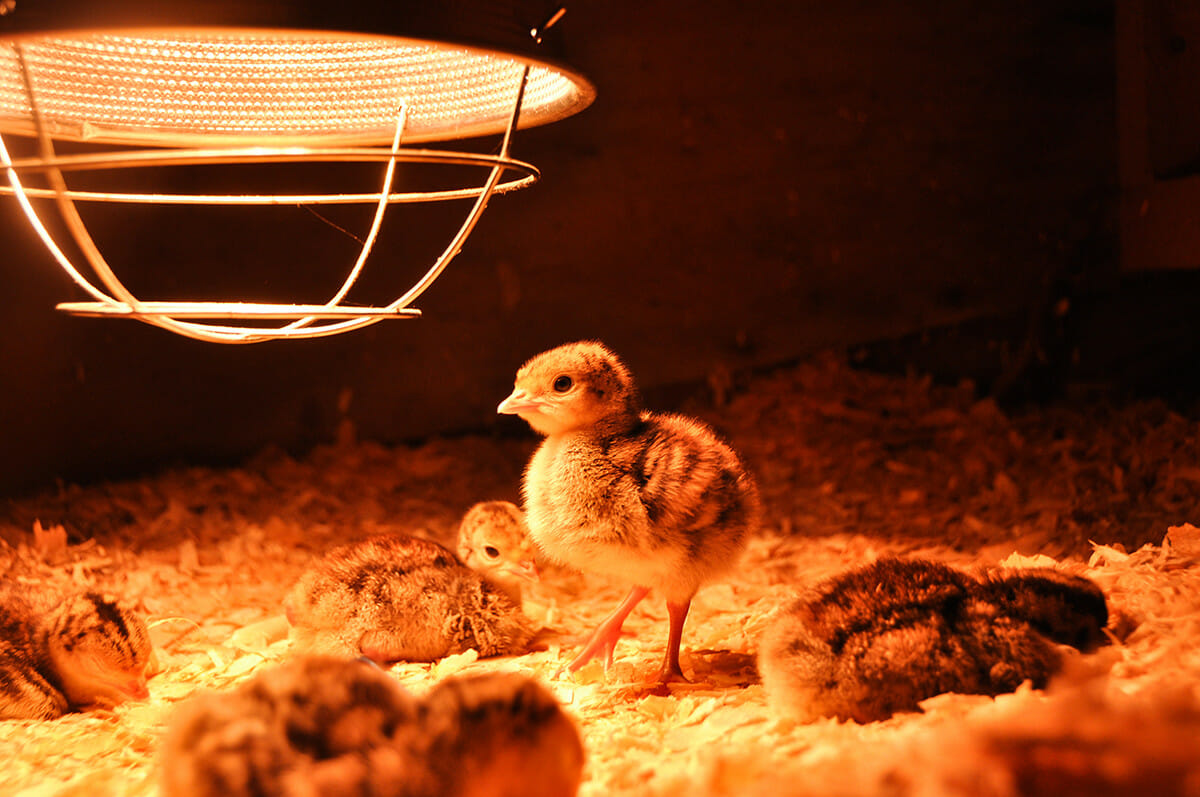
On the other end of the brooder, set up a heat lamp. If you have your chicks in the living room where it’s 65 degrees at night, a 100-watt incandescent bulb in a clamp-on utility light (the kind with a metal reflector) will provide enough warmth. If they’re in a barn, garage or another location that gets chilly, a heat lamp is in order. These special bulbs can be found at feed stores or ordered online.
The height of the bulb may need to be adjusted anywhere from 12 to 36 inches above the bottom of the brooder to maintain the optimal temperature for the chicks. One easy way to accomplish this is to hang the light fixture by a chain attached to a hook above the brooder.
If hot bulbs in close proximity to a cardboard box filled with wood shavings and baby chicks makes you nervous (it definitely qualifies as a fire hazard), consider an EcoGlow brooder heater, which are also designed to save energy.
Step 3 – Care for Your Chicks
Chicks need to be at a constant temperature of around 95 degrees for the first week of their life. Mail-order chicks are almost always less than 48 hours old; if you get your chicks at a feed store, ask how old they are before bringing them home. Adjust the height of the bulb and use a thermometer to measure the temperature at the bottom of the brooder to get it into the proper range before the chicks arrive.
Dip the beak of each chick into the water source as you put it in the brooder so it knows where to go when it’s thirsty.
The chicks will tell you if they are too hot or too cold: if they are huddled on top of each other directly under the bulb, move the bulb closer to warm them up; if they are pushing against the opposite wall of the brooder away from the bulb, it’s way too hot. Chicks milling about throughout the brooder is a good sign that the temperature is just right.
Lower the temperature of the brooder by about 5 degrees each week. As the chicks’ feathers fill in, they are more tolerant of cold, but they are also prone to overheating, so it’s important to keep the temperature just right.
Food and water should be available at all times. Chicks need a special ‘starter feed‘ during their time in the brooder. Starter feed has a crumbly texture, but gets clumpy when moist. If this occurs, clean out the feed tray and add fresh food to avoid mold developing.
It’s a good idea to clean out the food tray every few days anyway because the chicks can’t reach every bit and it will start to get stale. Waterers should be cleaned out daily (unless you’re using nipple waterers, which don’t require cleaning), and the bedding should be refreshed every other day by scooping out the top layer and adding shavings.
Once the chicks are six weeks old, their feathers should be filled out and they are capable of tolerating cool nighttime temperatures – so it’s time to transfer them to the coop. To smooth the transition, move the heat source, feeder and waterer into the coop for the first few days, and set up an adult-size feeder and waterer.
Follow us
Republish!
![]()
Republish our articles for free, online or in print, under a Creative Commons license.

This work is licensed under a Creative Commons Attribution-NoDerivatives 4.0 International License.
Want to republish a Modern Farmer story?
We are happy for Modern Farmer stories to be shared, and encourage you to republish our articles for your audience. When doing so, we ask that you follow these guidelines:
Please credit us and our writers
For the author byline, please use “Author Name, Modern Farmer.” At the top of our stories, if on the web, please include this text and link: “This story was originally published by Modern Farmer.”
Please make sure to include a link back to either our home page or the article URL.
At the bottom of the story, please include the following text:
“Modern Farmer is a nonprofit initiative dedicated to raising awareness and catalyzing action at the intersection of food, agriculture, and society. Read more at <link>Modern Farmer</link>.”
Use our widget
We’d like to be able to track our stories, so we ask that if you republish our content, you do so using our widget (located on the left hand side of the article). The HTML code has a built-in tracker that tells us the data and domain where the story was published, as well as view counts.
Check the image requirements
It’s your responsibility to confirm you're licensed to republish images in our articles. Some images, such as those from commercial providers, don't allow their images to be republished without permission or payment. Copyright terms are generally listed in the image caption and attribution. You are welcome to omit our images or substitute with your own. Charts and interactive graphics follow the same rules.
Don’t change too much. Or, ask us first.
Articles must be republished in their entirety. It’s okay to change references to time (“today” to “yesterday”) or location (“Iowa City, IA” to “here”). But please keep everything else the same.
If you feel strongly that a more material edit needs to be made, get in touch with us at [email protected]. We’re happy to discuss it with the original author, but we must have prior approval for changes before publication.
Special cases
Extracts. You may run the first few lines or paragraphs of the article and then say: “Read the full article at Modern Farmer” with a link back to the original article.
Quotes. You may quote authors provided you include a link back to the article URL.
Translations. These require writer approval. To inquire about translation of a Modern Farmer article, contact us at [email protected]
Signed consent / copyright release forms. These are not required, provided you are following these guidelines.
Print. Articles can be republished in print under these same rules, with the exception that you do not need to include the links.
Tag us
When sharing the story on social media, please tag us using the following: - Twitter (@ModFarm) - Facebook (@ModernFarmerMedia) - Instagram (@modfarm)
Use our content respectfully
Modern Farmer is a nonprofit and as such we share our content for free and in good faith in order to reach new audiences. Respectfully,
No selling ads against our stories. It’s okay to put our stories on pages with ads.
Don’t republish our material wholesale, or automatically; you need to select stories to be republished individually.
You have no rights to sell, license, syndicate, or otherwise represent yourself as the authorized owner of our material to any third parties. This means that you cannot actively publish or submit our work for syndication to third party platforms or apps like Apple News or Google News. We understand that publishers cannot fully control when certain third parties automatically summarize or crawl content from publishers’ own sites.
Keep in touch
We want to hear from you if you love Modern Farmer content, have a collaboration idea, or anything else to share. As a nonprofit outlet, we work in service of our community and are always open to comments, feedback, and ideas. Contact us at [email protected].by Brian Barth, Modern Farmer
April 15, 2015
Modern Farmer Weekly
Solutions Hub
Innovations, ideas and inspiration. Actionable solutions for a resilient food system.
ExploreExplore other topics
Share With Us
We want to hear from Modern Farmer readers who have thoughtful commentary, actionable solutions, or helpful ideas to share.
SubmitNecessary cookies are absolutely essential for the website to function properly. This category only includes cookies that ensures basic functionalities and security features of the website. These cookies do not store any personal information.
Any cookies that may not be particularly necessary for the website to function and are used specifically to collect user personal data via analytics, ads, other embedded contents are termed as non-necessary cookies.
So an article named how to build a brooder does not have anything about how to build a brooder. Thanks.
really could use some info on how to build a brooder
Its a very easy to understand guide for anyone, very helpful. Thanks for sharing.
I am looking for ideas on the best way to build a broader box. I have had bad experiences with chicken snakes so I was trying to build one that was a little more snake proof
Alright so we’re not gonna build a brooder today?
Please send weekly newsletter
I need information on a transition structure from brooded to coop to integrate chicks into flock coop.
Request for the weekly magazine
Please provide me with a weekly news letter
Do you need a heat lamp?