How to Successfully Start Seeds Inside
The beginning of spring doesn’t mean the end of frost.
How to Successfully Start Seeds Inside
The beginning of spring doesn’t mean the end of frost.
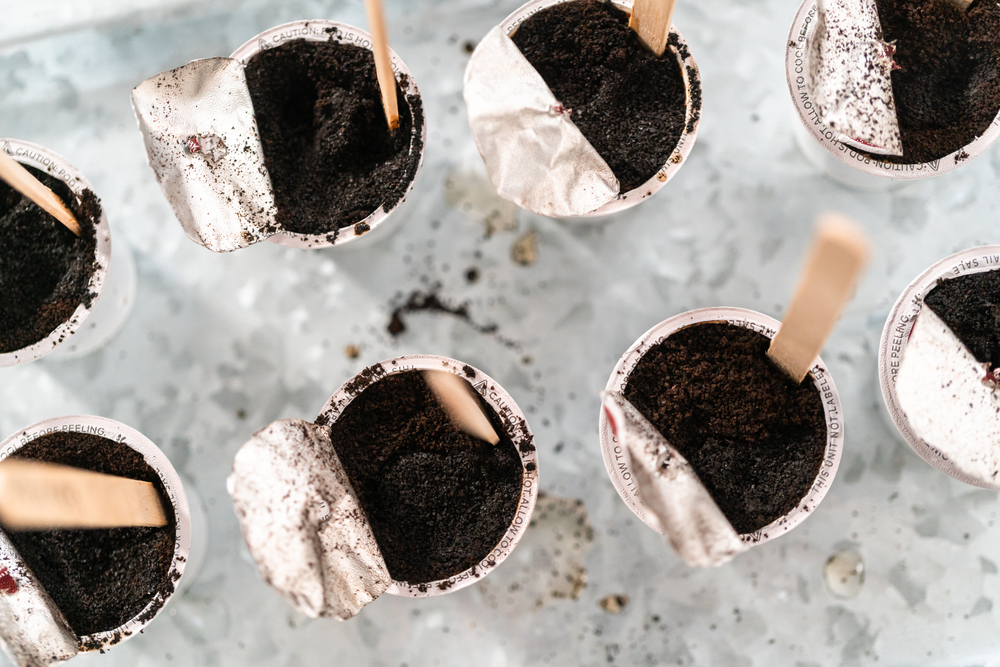
You can use coffee pods to start your seeds, but don't forget to poke drainage holes. by Arina P Habich/Shutterstock
The start of spring is, mercifully, right around the corner, which means gardening season is upon us. For those of us who don’t live in reliably warmer climes, though, the end of winter doesn’t necessarily mean the end of the occasional cold snap. So, let’s talk about how to start your seeds off indoors—think of it as a few weeks of sheltering in place for your plants to be.
So-called indirect sowing offers some advantages when compared to the outdoor alternative (known as—surprise!—“direct sowing”) since it allows for better control of the environment during those first few crucial weeks when the plants are particularly fragile and the weather is reliably fickle. The drawback, of course, is that you’ll eventually have to move your plants outside, a process that takes time and comes with its own risks. But don’t worry, we have tips for when that time comes, too.
When to Start
Every plant is different, but, typically, you’ll want to start your seeds indoors about six weeks before the expected last frost in your area. The exact start date will depend on a number of factors—what exactly you’re growing and where you’re growing it, chief among them—so it’s best to consult a professional planting calendar. The Old Farmer’s Almanac has a free, interactive one that can get you started.
What You’ll Need
You’ll need the seeds, obviously, but also a container to plant them in, some seed-starting mix to put in that container and plastic wrap to put over it. You might also want to buy a heat mat to set that container on and a grow light to hang above it all.
There is a variety of container options from which to choose—anything a few inches deep with drainage holes should work fine. If you’re thrifty, you can clean out an old plastic food container such as a yogurt cup or grab an empty egg carton; just don’t forget to make a few holes in the bottom for drainage. You can also buy a standard container from the store or opt for a seed flat or tray, which tend to work better for particularly small seeds.
You’ll want to avoid using standard potting soil—while it will do the job for a full-grown plant, it can be too dense for seeds and seedlings. Starting mix will allow for better drainage and is specially formulated to avoid pathogens that can be deadly in a plant’s early stages of life. (It’s possible to make your own seed-starting mix, but if you’re just starting out, it’s best to just buy a bag from your local gardening store.)
Whether you need a grow light or not depends on the plant and where you’re keeping it. Many vegetables, for instance, need about eight hours of light a day—so, if you don’t have a window in your home that gets a lot of reliable sunshine, you may need to invest in a light. Meanwhile, heat mats can help keep your seeds warm as they germinate, especially if the temperature in your house is on the cooler side.
Getting Started
First, double and triple check that your containers are clean and have drainage holes. You’ll also want to keep your seed packets handy, as they can contain special directions unique to each plant. OK, now you’re ready to plant.
Step 1: Hand-pack your clean containers with seed-starting mix.
Step 2: Make a shallow depression with your finger for the seed. Plant it at the depth recommended on the seed packet, typically about a half-inch down. You can use your fingers for this part or opt for the eraser-end of a pencil or similar object.
Step 3: Sprinkle a little more seed-starting mix on top.
Step 4: Label your trays. This is particularly important if you’ve decided to grow more than one type of plant or several varieties of the same one.
Step 5: Now gently water the trays. Watering from the bottom is best, but most important is to avoid watering with so much force that you dislodge the seeds. Think watering can, not water pitcher. You want the soil to be damp—not dripping wet or dry, but damp.
Step 6: Poke a few holes in the plastic wrap and use it to cover the plant. The plastic will lock in the moisture, speeding up the germination process.
Step 7: Put your container somewhere warm—on a heat mat if you have one or on top of your refrigerator if you don’t.
Stay Vigilant
Congratulations, you’ve started your seeds! Now, comes the hard part: keeping them alive.
You’ll want to keep a close eye on your plants, so check the containers a couple of times a day. If after a day or three, you don’t see any condensation on the inside of the plastic wrap, add a little more water. Then, at the first sign of a sprout, remove the plastic wrap completely, and move the container somewhere with reliably bright light—be it the windowsill or under a grow light. If you choose the artificial option, you want to keep the light about an inch away from the top of the plant. You’ll have to raise it regularly as your plant grows taller. It’s better to be too close than not close enough. Continue to water your plant as necessary.
The Long Goodbye
You’ll want to start prepping your new plants for life outside about a week or two before you’re ready to transplant them into your garden. You do this with a process known as “hardening off.” It’s elegantly simple: Take your plant outside and leave it somewhere safe for about an hour and then bring it back inside. Each subsequent day, leave the plant out for a bit longer.
It’s more art than science, though—if it’s a particularly hot, windy or rainy day, you’ll want to limit the time outside or eliminate it altogether. The goal is to acclimate your plant to its future environment, not to overwhelm it with the elements. Then, a few days after the final frost, you transplant your plants to your garden and say your goodbyes. They grow up so fast!
Follow us
Republish!
![]()
Republish our articles for free, online or in print, under a Creative Commons license.

This work is licensed under a Creative Commons Attribution-NoDerivatives 4.0 International License.
Want to republish a Modern Farmer story?
We are happy for Modern Farmer stories to be shared, and encourage you to republish our articles for your audience. When doing so, we ask that you follow these guidelines:
Please credit us and our writers
For the author byline, please use “Author Name, Modern Farmer.” At the top of our stories, if on the web, please include this text and link: “This story was originally published by Modern Farmer.”
Please make sure to include a link back to either our home page or the article URL.
At the bottom of the story, please include the following text:
“Modern Farmer is a nonprofit initiative dedicated to raising awareness and catalyzing action at the intersection of food, agriculture, and society. Read more at <link>Modern Farmer</link>.”
Use our widget
We’d like to be able to track our stories, so we ask that if you republish our content, you do so using our widget (located on the left hand side of the article). The HTML code has a built-in tracker that tells us the data and domain where the story was published, as well as view counts.
Check the image requirements
It’s your responsibility to confirm you're licensed to republish images in our articles. Some images, such as those from commercial providers, don't allow their images to be republished without permission or payment. Copyright terms are generally listed in the image caption and attribution. You are welcome to omit our images or substitute with your own. Charts and interactive graphics follow the same rules.
Don’t change too much. Or, ask us first.
Articles must be republished in their entirety. It’s okay to change references to time (“today” to “yesterday”) or location (“Iowa City, IA” to “here”). But please keep everything else the same.
If you feel strongly that a more material edit needs to be made, get in touch with us at [email protected]. We’re happy to discuss it with the original author, but we must have prior approval for changes before publication.
Special cases
Extracts. You may run the first few lines or paragraphs of the article and then say: “Read the full article at Modern Farmer” with a link back to the original article.
Quotes. You may quote authors provided you include a link back to the article URL.
Translations. These require writer approval. To inquire about translation of a Modern Farmer article, contact us at [email protected]
Signed consent / copyright release forms. These are not required, provided you are following these guidelines.
Print. Articles can be republished in print under these same rules, with the exception that you do not need to include the links.
Tag us
When sharing the story on social media, please tag us using the following: - Twitter (@ModFarm) - Facebook (@ModernFarmerMedia) - Instagram (@modfarm)
Use our content respectfully
Modern Farmer is a nonprofit and as such we share our content for free and in good faith in order to reach new audiences. Respectfully,
No selling ads against our stories. It’s okay to put our stories on pages with ads.
Don’t republish our material wholesale, or automatically; you need to select stories to be republished individually.
You have no rights to sell, license, syndicate, or otherwise represent yourself as the authorized owner of our material to any third parties. This means that you cannot actively publish or submit our work for syndication to third party platforms or apps like Apple News or Google News. We understand that publishers cannot fully control when certain third parties automatically summarize or crawl content from publishers’ own sites.
Keep in touch
We want to hear from you if you love Modern Farmer content, have a collaboration idea, or anything else to share. As a nonprofit outlet, we work in service of our community and are always open to comments, feedback, and ideas. Contact us at [email protected].by Josh Voorhees, Modern Farmer
March 21, 2021
Modern Farmer Weekly
Solutions Hub
Innovations, ideas and inspiration. Actionable solutions for a resilient food system.
ExploreExplore other topics
Share With Us
We want to hear from Modern Farmer readers who have thoughtful commentary, actionable solutions, or helpful ideas to share.
SubmitNecessary cookies are absolutely essential for the website to function properly. This category only includes cookies that ensures basic functionalities and security features of the website. These cookies do not store any personal information.
Any cookies that may not be particularly necessary for the website to function and are used specifically to collect user personal data via analytics, ads, other embedded contents are termed as non-necessary cookies.
Thanks for the startup ideas