A Guide to Quick Pickling Your Fall Vegetables
Master this basic method in food preservation.
A Guide to Quick Pickling Your Fall Vegetables
Master this basic method in food preservation.
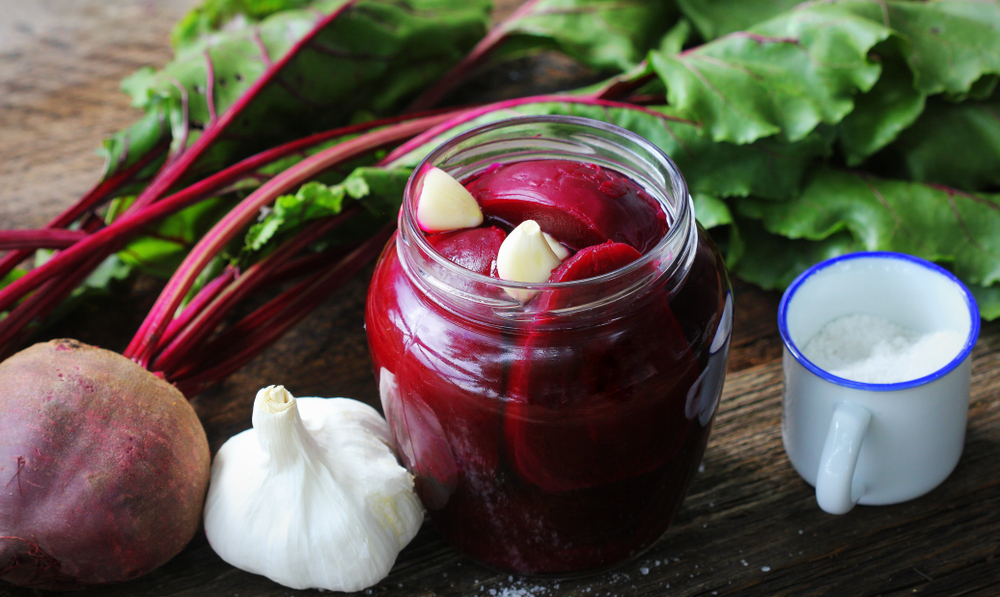
Pickle to preserve your harvest.by vaivirga on Shutterstock
Now that it’s fall, it’s time to bask in the glory of all of the beets, carrots, cauliflower and cabbage that you’ve plucked out of the ground.
But whether you’re a seasoned grower or first-time gardener, you might have more food than you know what to do with. And some of your surplus veggies will likely end up in a compost bin or in the trash before you get the chance to eat them. A study conducted by nonprofit Ampleharvest.org found that up to 11.5 billion pounds of excess produce is wasted each year. The USDA estimates that 30 to 40 percent of our food supply ends up in a landfill.
One way to ensure you’re not contributing to this very large problem is by preserving your food. There are a number of methods like freezing, drying or dehydrating that are effective choices for extending the shelf life of your home-grown treasures for weeks, even months. Today we’re going to tackle a basic method of pickling.
In order to pickle your produce, you’ll need an acidic solution, such as vinegar or salt brine. We’ll walk you through a process that involves using a hot mixture of water, vinegar, sugar and whatever spices you have on hand—otherwise known as quick pickling.
What you’ll need
Prepping your produce
Experts from University of Wisconsin Extension say for best results use produce that’s been harvested within the last 24 hours. If you aren’t able to pickle immediately, refrigerate your vegetables for no more than a few days.
Before you start slicing or peeling, it’s important to carefully wash your vegetables to get rid of any dirt on them. This can be a source of bacteria, which could cause your vegetables to soften during the pickling process. Areas around the stem will require special scrubbing attention.
You can now start peeling and chopping. Get rid of any blemishes or soft spots. Firmer vegetables, like beets or carrots, you might want to boil a bit before you pickle them so that the texture is softer for when it’s tasting time.
It’s really up to you on what you want your veggies to look like, but once you’ve sliced or cubed them to your liking, place them in a jar. We have a simple brine for you below and based on those measurements, you can use about 2.5 to 3 cups of vegetables.
*Note: You’ll want to sterilize your jars before you put your vegetables into them. You can do this by washing them in warm soapy water and then boiling them for 10 minutes. Keep them hot until it’s time to dump the vegetables in them.
Making your base
There are lots of ways to make your base depending on how sweet or salty you want your vegetables to be. The National Center for Home Food Preservation has a lot of different recipes. But if you want to start out simple and just make a basic brine, it would be safe to go with equal parts vinegar and water with a sixteenth of that amount in equal parts salt and sugar. See sample measurements below. This mixture is enough for vegetables that will fit into a half-gallon jar or roughly two-quart mason jars:
It’s important to use water with low levels of minerals and chlorine, known as soft water. If you’re unsure about the composition of your water, boil it for 15 minutes in a stainless steel pot and allow it to sit covered for 24 hours. It’s possible that there will be a coating on the surface of your water. Use a ladle to remove this.
When you have all your ingredients for the base, combine them into your stainless steel pot and bring to a boil for 10 minutes. Stir occasionally to ensure the salt and sugar dissolve.
Adding spice
While your brine is boiling, add your spices to the jars with your veggies. We recommend you use fresh spices (or at least ones that are not in powdered form). Powdered spices will cloud your mixture and they aren’t as strong in flavor.
There are a number of options you have for spices. A standard combination that pairs well with the base we’ve provided is whole black pepper corn, mustard seeds, coriander and dill.
Others you could choose from or add into the mix could consist of anything from bay leaves, cinnamon sticks, chilli peppers, fennel seeds, garlic cloves, fenugreek, turmeric, ginger, thyme, tarragon, basil, sage and tarragon. Put your own twist on your pickling creation.
Mixing it all together
Allow your brine solution to cool to a lukewarm temperature and pour it into your jars over the vegetables and the spices you have chosen. All the vegetables should be completely submerged. Fill each jar with this mixture and leave about half an inch of headspace from the lid.
You don’t want any air bubbles before you seal your jars shut. You can remove them with a spatula or other cooking utensil. At this point you can add an airtight lid. Be mindful of any remaining air bubbles. If you tap and wiggle the jars from left to right this will help get rid of them.
Let your jars cool to room temperature and then put them in the refrigerator. Wait at least 48 hours before tasting the final product. You can typically keep quick pickled produce in your fridge for two to three months before it will start to go bad.
Follow us
Republish!
![]()
Republish our articles for free, online or in print, under a Creative Commons license.

This work is licensed under a Creative Commons Attribution-NoDerivatives 4.0 International License.
Want to republish a Modern Farmer story?
We are happy for Modern Farmer stories to be shared, and encourage you to republish our articles for your audience. When doing so, we ask that you follow these guidelines:
Please credit us and our writers
For the author byline, please use “Author Name, Modern Farmer.” At the top of our stories, if on the web, please include this text and link: “This story was originally published by Modern Farmer.”
Please make sure to include a link back to either our home page or the article URL.
At the bottom of the story, please include the following text:
“Modern Farmer is a nonprofit initiative dedicated to raising awareness and catalyzing action at the intersection of food, agriculture, and society. Read more at <link>Modern Farmer</link>.”
Use our widget
We’d like to be able to track our stories, so we ask that if you republish our content, you do so using our widget (located on the left hand side of the article). The HTML code has a built-in tracker that tells us the data and domain where the story was published, as well as view counts.
Check the image requirements
It’s your responsibility to confirm you're licensed to republish images in our articles. Some images, such as those from commercial providers, don't allow their images to be republished without permission or payment. Copyright terms are generally listed in the image caption and attribution. You are welcome to omit our images or substitute with your own. Charts and interactive graphics follow the same rules.
Don’t change too much. Or, ask us first.
Articles must be republished in their entirety. It’s okay to change references to time (“today” to “yesterday”) or location (“Iowa City, IA” to “here”). But please keep everything else the same.
If you feel strongly that a more material edit needs to be made, get in touch with us at [email protected]. We’re happy to discuss it with the original author, but we must have prior approval for changes before publication.
Special cases
Extracts. You may run the first few lines or paragraphs of the article and then say: “Read the full article at Modern Farmer” with a link back to the original article.
Quotes. You may quote authors provided you include a link back to the article URL.
Translations. These require writer approval. To inquire about translation of a Modern Farmer article, contact us at [email protected]
Signed consent / copyright release forms. These are not required, provided you are following these guidelines.
Print. Articles can be republished in print under these same rules, with the exception that you do not need to include the links.
Tag us
When sharing the story on social media, please tag us using the following: - Twitter (@ModFarm) - Facebook (@ModernFarmerMedia) - Instagram (@modfarm)
Use our content respectfully
Modern Farmer is a nonprofit and as such we share our content for free and in good faith in order to reach new audiences. Respectfully,
No selling ads against our stories. It’s okay to put our stories on pages with ads.
Don’t republish our material wholesale, or automatically; you need to select stories to be republished individually.
You have no rights to sell, license, syndicate, or otherwise represent yourself as the authorized owner of our material to any third parties. This means that you cannot actively publish or submit our work for syndication to third party platforms or apps like Apple News or Google News. We understand that publishers cannot fully control when certain third parties automatically summarize or crawl content from publishers’ own sites.
Keep in touch
We want to hear from you if you love Modern Farmer content, have a collaboration idea, or anything else to share. As a nonprofit outlet, we work in service of our community and are always open to comments, feedback, and ideas. Contact us at [email protected].by Lindsay Campbell, Modern Farmer
October 11, 2020
Modern Farmer Weekly
Solutions Hub
Innovations, ideas and inspiration. Actionable solutions for a resilient food system.
ExploreExplore other topics
Share With Us
We want to hear from Modern Farmer readers who have thoughtful commentary, actionable solutions, or helpful ideas to share.
SubmitNecessary cookies are absolutely essential for the website to function properly. This category only includes cookies that ensures basic functionalities and security features of the website. These cookies do not store any personal information.
Any cookies that may not be particularly necessary for the website to function and are used specifically to collect user personal data via analytics, ads, other embedded contents are termed as non-necessary cookies.