How to Germinate Seeds With an Instant Pot
Hack your way to “instant” garden success.
How to Germinate Seeds With an Instant Pot
Hack your way to “instant” garden success.
It’s not just for rice and ribs, folks. by Jeramey Lende/Shutterstock
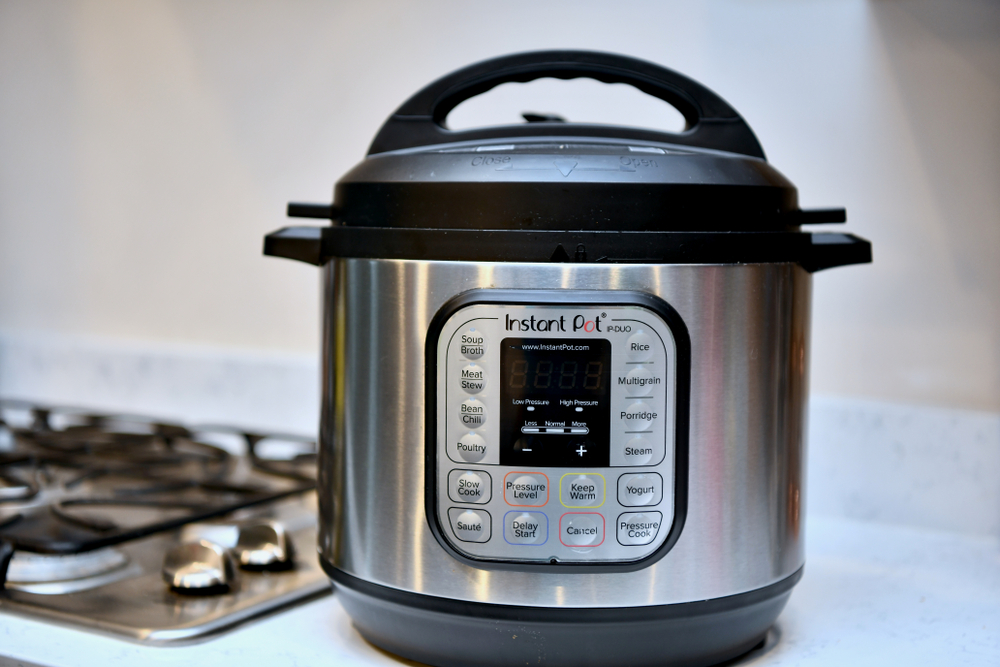
In recent years, the Instant Pot has soared in popularity as a one-stop shop for pressure-cooking, sautéing, steaming and boiling. Its multi-uses have made it a useful appliance to easily prepare anything from rice to pot-roast. But one lesser-known function of this kitchen gadget is that it can serve as a reliable incubator for germinating garden seeds.
This can be particularly helpful if you want to speed up germination with warm-weather crops, such as tomatoes, melons, peppers and cucumbers, and you don’t want to buy a heating mat. It can also be a useful tool if you’re simply late to germinate your seeds or live in an area with a colder climate and a shorter growing season.
For those new to gardening, seed germination is the first process in growing food when a seed breaks out of its dormant stage and begins its development into a seedling. Seeds require a certain temperature and moisture to transition out of their dormant state. Most seeds germinate in an environment between 68°F and 86°F.
At its lowest “yogurt setting” at 91°F, the Instant Pot is able to provide a controlled, consistent greenhouse-like environment, producing germinated seeds in as little time as 24 hours to seven days. Given that the temperature of the water is on the higher side, this method is best for warmer-weather crops or those that prefer a temperature range from 76°F to 86°F. We don’t recommend using the Instant Pot for cool-weather crops, such as those in the brassica family.
If you’re unsure about what may be the ideal temperature for your seeds and it doesn’t say on your seed package, the University of California has compiled this helpful cheat sheet.
Want to give it a whirl? Follow our instructions below.
What you will need:
Additional Care Tips:
After germination occurs, seedlings require about 12 to 16 hours of light each day. If you do not have access to sunlight for this amount of time, grow lights are a helpful tool. Your potting mix should also have good air flow to prevent damping off disease. University of Minnesota Extension explains how to identify, prevent and manage the disease here.
You will also need to “harden off” your seedlings for a few weeks before you move them outside. This essentially means gradually introducing your seedlings to outdoor-like conditions while they are indoors to ensure they transition well when it is time to plant them in the garden. The University of Maryland Extension provides a few tips on best practices here.
Follow us
Republish!

Republish our articles for free, online or in print, under a Creative Commons license.

This work is licensed under a Creative Commons Attribution-NoDerivatives 4.0 International License.
Want to republish a Modern Farmer story?
We are happy for Modern Farmer stories to be shared, and encourage you to republish our articles for your audience. When doing so, we ask that you follow these guidelines:
Please credit us and our writers
For the author byline, please use “Author Name, Modern Farmer.” At the top of our stories, if on the web, please include this text and link: “This story was originally published by Modern Farmer.”
Please make sure to include a link back to either our home page or the article URL.
At the bottom of the story, please include the following text:
“Modern Farmer is a nonprofit initiative dedicated to raising awareness and catalyzing action at the intersection of food, agriculture, and society. Read more at <link>Modern Farmer</link>.”
Use our widget
We’d like to be able to track our stories, so we ask that if you republish our content, you do so using our widget (located on the left hand side of the article). The HTML code has a built-in tracker that tells us the data and domain where the story was published, as well as view counts.
Check the image requirements
It’s your responsibility to confirm you're licensed to republish images in our articles. Some images, such as those from commercial providers, don't allow their images to be republished without permission or payment. Copyright terms are generally listed in the image caption and attribution. You are welcome to omit our images or substitute with your own. Charts and interactive graphics follow the same rules.
Don’t change too much. Or, ask us first.
Articles must be republished in their entirety. It’s okay to change references to time (“today” to “yesterday”) or location (“Iowa City, IA” to “here”). But please keep everything else the same.
If you feel strongly that a more material edit needs to be made, get in touch with us at [email protected]. We’re happy to discuss it with the original author, but we must have prior approval for changes before publication.
Special cases
Extracts. You may run the first few lines or paragraphs of the article and then say: “Read the full article at Modern Farmer” with a link back to the original article.
Quotes. You may quote authors provided you include a link back to the article URL.
Translations. These require writer approval. To inquire about translation of a Modern Farmer article, contact us at [email protected]
Signed consent / copyright release forms. These are not required, provided you are following these guidelines.
Print. Articles can be republished in print under these same rules, with the exception that you do not need to include the links.
Tag us
When sharing the story on social media, please tag us using the following: - Twitter (@ModFarm) - Facebook (@ModernFarmerMedia) - Instagram (@modfarm)
Use our content respectfully
Modern Farmer is a nonprofit and as such we share our content for free and in good faith in order to reach new audiences. Respectfully,
No selling ads against our stories. It’s okay to put our stories on pages with ads.
Don’t republish our material wholesale, or automatically; you need to select stories to be republished individually.
You have no rights to sell, license, syndicate, or otherwise represent yourself as the authorized owner of our material to any third parties. This means that you cannot actively publish or submit our work for syndication to third party platforms or apps like Apple News or Google News. We understand that publishers cannot fully control when certain third parties automatically summarize or crawl content from publishers’ own sites.
Keep in touch
We want to hear from you if you love Modern Farmer content, have a collaboration idea, or anything else to share. As a nonprofit outlet, we work in service of our community and are always open to comments, feedback, and ideas. Contact us at [email protected].by Lindsay Campbell, Modern Farmer
April 11, 2021
Modern Farmer Weekly
Solutions Hub
Innovations, ideas and inspiration. Actionable solutions for a resilient food system.
ExploreExplore other topics
Share With Us
We want to hear from Modern Farmer readers who have thoughtful commentary, actionable solutions, or helpful ideas to share.
SubmitNecessary cookies are absolutely essential for the website to function properly. This category only includes cookies that ensures basic functionalities and security features of the website. These cookies do not store any personal information.
Any cookies that may not be particularly necessary for the website to function and are used specifically to collect user personal data via analytics, ads, other embedded contents are termed as non-necessary cookies.
I guess this assumes you don’t use you Instant Pot daily, like I do!
Do you seal the Ziplock bags? I have and it seem obvious… but nobody specifically says…
Thank you for this great tip! Did you use a mesh strainer, or a colander? Would a collapsible veggie steamer work?
Thanks for explanation. One question is it one paper towel per baggie or multiple paper towels per baggie?