How to Build a Cold Frame in 20 Minutes for Under $40
Three easy steps to protecting your crops from frost
How to Build a Cold Frame in 20 Minutes for Under $40
Three easy steps to protecting your crops from frost
by Bildagentur Zoonar GmbH/Shutterstock
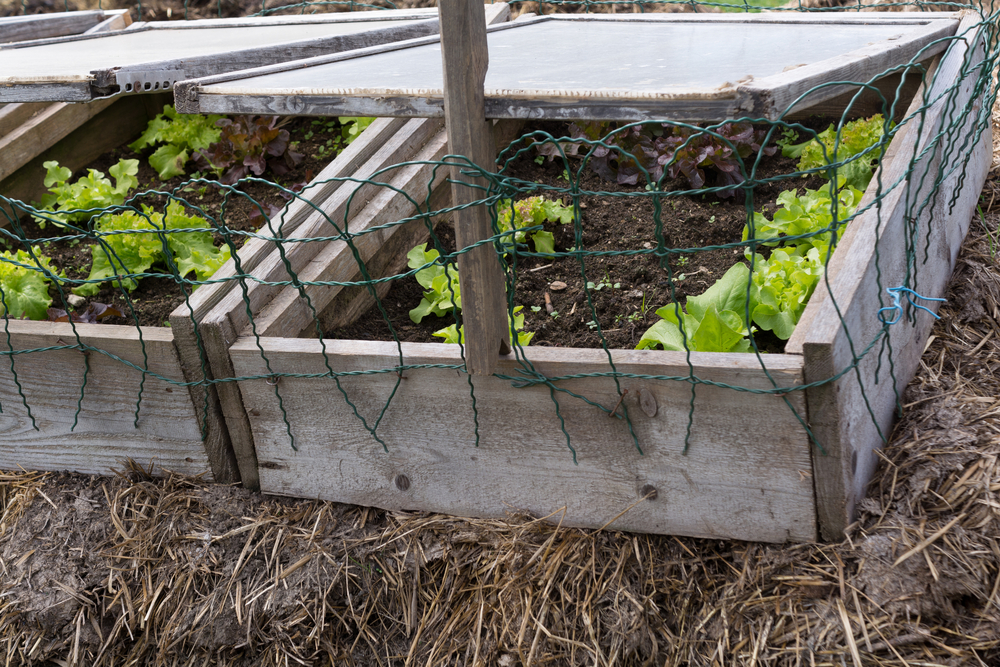
Cold frames are season-extending covers constructed over vegetable beds to keep the frost off. Like a miniature, temporary greenhouse, they are employed in early spring to create a warm space for seedlings to get a head start on the growing season, or during the fall to extend the growing season for cold-hardy crops, which include most greens, herbs and root vegetables. In mild winter climates, it’s possible to keep these vegetables going until the following spring with a cold frame.
A cold frame consists of little more than a translucent cover and a structure to support it. The key is that it must be fairly airtight to keep the cold out. When the sun hits it during the day, it heats up inside (to a temperature significantly higher than the outside air) and then holds some of that warmth through the night (typically keeping the bed a few degrees warmer than the outside air).
You can build a beautiful cold frame with glass and mitered wood. This takes skill, time, and a not-insignificant financial investment. Or you can follow the instructions below and be done with it in 15 minutes or so.
Materials
The following supplies will cover a bed four by eight feet in size
Five pieces of ¾-inch-by-10-feet PVC pipe
10 pieces of ½-inch-by-1-foot rebar
12-foot-by-16-foot piece of clear plastic sheeting
Step One
Using a hammer, pound a piece of rebar halfway into the ground at each of the four corners of the bed and every two feet along the long sides of the bed.
Step Two
Slide one end of a piece of PVC onto the rebar stake at one of the corners and bend it over the bed to slide the other end onto the rebar stake at the adjacent corner. Repeat this process along the length of the bed to form a series of five parallel hoops.
Step Three
Drape the plastic over the PVC frame so that it is touching the ground on all four sides. Secure the plastic to the ground by weighing down the edges with bricks, rocks, logs, two-by-fours or any other small, heavy objects you have on hand. Make sure the plastic is stretched as tautly as possible over the frame.
Follow us
Republish!
![]()
Republish our articles for free, online or in print, under a Creative Commons license.

This work is licensed under a Creative Commons Attribution-NoDerivatives 4.0 International License.
Want to republish a Modern Farmer story?
We are happy for Modern Farmer stories to be shared, and encourage you to republish our articles for your audience. When doing so, we ask that you follow these guidelines:
Please credit us and our writers
For the author byline, please use “Author Name, Modern Farmer.” At the top of our stories, if on the web, please include this text and link: “This story was originally published by Modern Farmer.”
Please make sure to include a link back to either our home page or the article URL.
At the bottom of the story, please include the following text:
“Modern Farmer is a nonprofit initiative dedicated to raising awareness and catalyzing action at the intersection of food, agriculture, and society. Read more at <link>Modern Farmer</link>.”
Use our widget
We’d like to be able to track our stories, so we ask that if you republish our content, you do so using our widget (located on the left hand side of the article). The HTML code has a built-in tracker that tells us the data and domain where the story was published, as well as view counts.
Check the image requirements
It’s your responsibility to confirm you're licensed to republish images in our articles. Some images, such as those from commercial providers, don't allow their images to be republished without permission or payment. Copyright terms are generally listed in the image caption and attribution. You are welcome to omit our images or substitute with your own. Charts and interactive graphics follow the same rules.
Don’t change too much. Or, ask us first.
Articles must be republished in their entirety. It’s okay to change references to time (“today” to “yesterday”) or location (“Iowa City, IA” to “here”). But please keep everything else the same.
If you feel strongly that a more material edit needs to be made, get in touch with us at [email protected]. We’re happy to discuss it with the original author, but we must have prior approval for changes before publication.
Special cases
Extracts. You may run the first few lines or paragraphs of the article and then say: “Read the full article at Modern Farmer” with a link back to the original article.
Quotes. You may quote authors provided you include a link back to the article URL.
Translations. These require writer approval. To inquire about translation of a Modern Farmer article, contact us at [email protected]
Signed consent / copyright release forms. These are not required, provided you are following these guidelines.
Print. Articles can be republished in print under these same rules, with the exception that you do not need to include the links.
Tag us
When sharing the story on social media, please tag us using the following: - Twitter (@ModFarm) - Facebook (@ModernFarmerMedia) - Instagram (@modfarm)
Use our content respectfully
Modern Farmer is a nonprofit and as such we share our content for free and in good faith in order to reach new audiences. Respectfully,
No selling ads against our stories. It’s okay to put our stories on pages with ads.
Don’t republish our material wholesale, or automatically; you need to select stories to be republished individually.
You have no rights to sell, license, syndicate, or otherwise represent yourself as the authorized owner of our material to any third parties. This means that you cannot actively publish or submit our work for syndication to third party platforms or apps like Apple News or Google News. We understand that publishers cannot fully control when certain third parties automatically summarize or crawl content from publishers’ own sites.
Keep in touch
We want to hear from you if you love Modern Farmer content, have a collaboration idea, or anything else to share. As a nonprofit outlet, we work in service of our community and are always open to comments, feedback, and ideas. Contact us at [email protected].by Brian Barth, Modern Farmer
October 20, 2019
Modern Farmer Weekly
Solutions Hub
Innovations, ideas and inspiration. Actionable solutions for a resilient food system.
ExploreExplore other topics
Share With Us
We want to hear from Modern Farmer readers who have thoughtful commentary, actionable solutions, or helpful ideas to share.
SubmitNecessary cookies are absolutely essential for the website to function properly. This category only includes cookies that ensures basic functionalities and security features of the website. These cookies do not store any personal information.
Any cookies that may not be particularly necessary for the website to function and are used specifically to collect user personal data via analytics, ads, other embedded contents are termed as non-necessary cookies.
It would be nice if you had a photo of the cold frame constructed with the rebar. As they say, a picture is worth a thousand rebars!
I don’t think this would look like the one in the picture. Kind of confusing.
Brian does not know the difference between a cold frame and a hoop house. Makes any information on modernfarmer suspect. Too bad!
Seems like a decent design except for the part where the plastic sheet is simply secured by bricks; I think the excess sheet material will collect rainwater and provide an environment for mosquitoes to breed. If the excess sheet could be covered by dirt, it might help combat that.
This is not a cold frame in the instructions. Thats a hoop house. The photo is a cold frame.
you have your wording wrong – the directions listed are for a hoop tunnel to extend the growing season. A cold frame is used at the beginning of the season to give seedlings a head start. I’ve made mini-temporary hoop structures as directed below to extend winter crops like kale, spinach, chard, etc. They work well, are easy and inexpensive to construct, and easy to remove when finished with them.
Hello
I’m a fan in Oxfordshire England. What is rebar? What would be an equivalent?
Thank you ?