By Shepherd Ogden
on March 29, 2016
Not pleased with what you pull from the ground? Your dirt may be to blame. Collecting samples properly - and sending them to a good lab - may be the most important thing you do this season.
For about $15, you can get a down-and-dirty soil analysis from your state university’s agricultural lab – including results for phosphorus, potassium, pH (acidity), and organic matter content. But you may be left in the dark about nitrogen, crucial for leafy crops. Also, state-lab solutions tend to begin and end with conventional fertilizers, when a more eco-friendly route may be what you’re after.
Instead, consider forking over about $50 for the basic test from a commercial lab such as Woods End in Maine, or California’s Control Laboratories. Reports from outfits like these will usually include results for nitrogen, phosphorus, potassium, pH, calcium, magnesium, and organic matter. A few dollars more buys feedback on micronutrients such as copper, zinc, iron, and manganese. Both labs will offer recommendations for remediating soil organically.
Of course, even the best lab won’t deliver useful results from faulty samples. Collect the samples before applying lime or fertilizer, and preferably on bare ground, as soon as the ground thaws enough to allow it. Turnaround time runs one or two weeks. You can also test in fall for next year’s crops.
Because the terrain on your property may vary from area to area, limit each test to five acres, conducting separate tests for sections that differ in moisture, soil structure, or crop history. Within each test area, choose 15 locations spaced equally apart and note them on a map for future reference; you’ll want to sample the same spots every year. (Mark your locations on a printout of a satellite-view Google map at the highest resolution.)
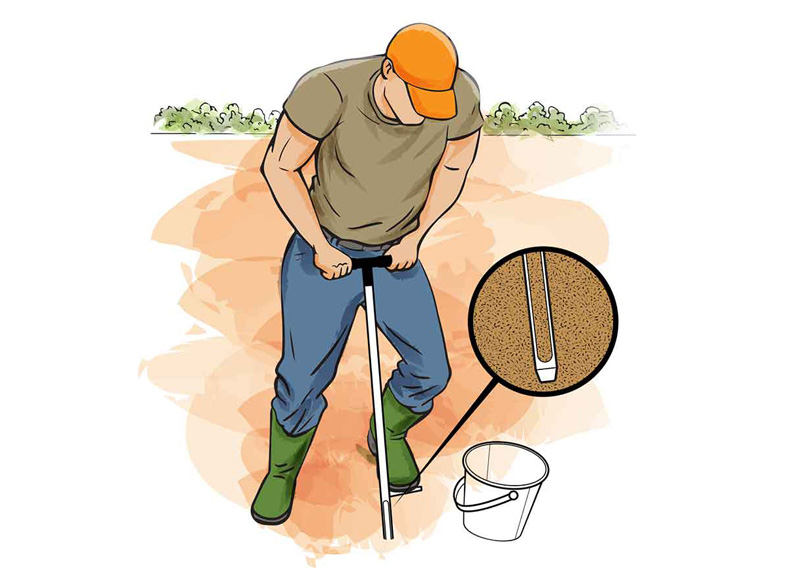
A shovel can handle the job, but a soil probe, a T-shaped device that you drive into the ground to extract a “core,” will serve you better. Choose a probe with a horizontal foot bar, which will provide leverage and serve as a gauge to ensure your samples come from a consistent depth (about $90; ams-samplers.com). Simply work the tool a foot into the ground and then lift it out. Use a knife to extract just the middle of the exposed soil column from each site, avoiding grass or other surface matter and removing any stones. Crush, then mix the 15 samples together in a plastic bucket, not a galvanized one, as its zinc will throw off results. Take enough soil from the bucket to fi ll about a third of the bag provided by the lab. (If the lab doesn’t provide a bag, put 2 cups of the mixture in a freezer storage bag.)
Print and fill out the lab’s downloadable “sample data” form, on which you’ll indicate what you plan to grow, and make a copy to file along with your map before sending the form off . When you receive the results, follow the instructions for bringing your nutrients up to par. (These could range from a state lab’s directive to “broadcast 2.5 pounds of nitrogen per 1,000 square feet” to a private lab’s prescription for “a compost-tea drench at a rate of 2.5 to 5 gallons per 1,000 square feet.”) In the process, you’ll be establishing a fertility baseline you can refer to year after year.
Why would one want to ” mix the 15 samples together in a plastic bucket”? Is it not better to provide all individual samples from each 5 acre area on its own for greater accuracy?