By Fred Bove
on May 23, 2013
The increased crop productivity and long-term benefits of vermicompost are undeniable.
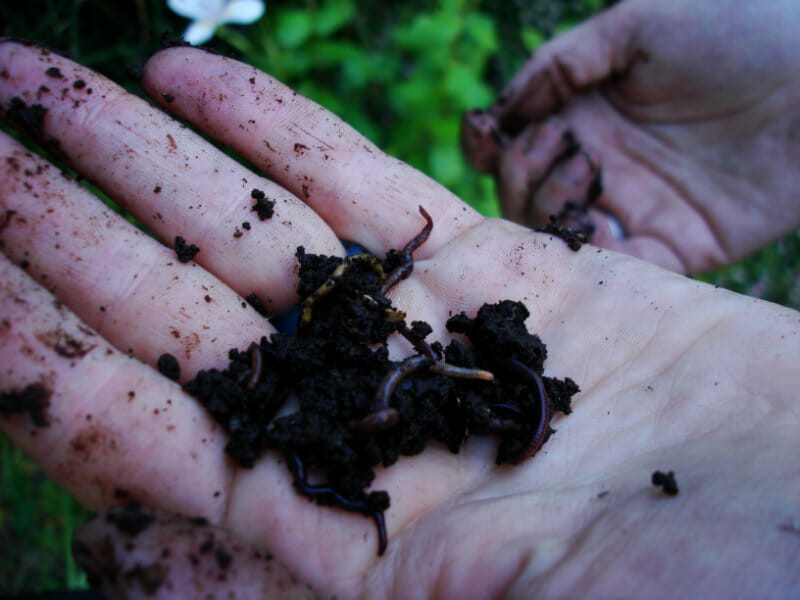
It looks like rich, dark compost. It contains five times more nitrogen, seven times more phosphorus and 11 times more potassium than ordinary soil. It’s vermicompost – super soil produced as a result of the digestion process of the humble earthworm.
It’s basic stuff, but the increased crop productivity, and long-term benefits of vermicompost are undeniable. Soil conditioned with this “black gold,” is what keeps many farm and garden operations from going under. It improves soil structure, increases yield and even improves the taste of fruits and vegetables, and makes them last longer in the field. And, it doesn’t require fancy chemicals or industrial packaging. It does it the old fashioned way, with millions of employees. Squirmy, red employees. Red Wigglers, or Eisenia fetida, to be exact.
Vermicompost can be produced in a tiny urban closet, or on a large ranch. In Sonoma County, California, Jack Chambers goes big. He produces 35,000 pounds a month at Sonoma Valley Worm Farm. Chambers bought the 1-acre operation in 1992, and since then, he figures he’s diverted 1.8 million tons of food from entering landfills by recycling agricultural waste, and selling worms to home composters.
It all starts with manure from a nearby organic dairy. This is subject to what Chambers calls the “pre-composting phase.” The waste is delivered to the farm and pile composted at high temperatures to kill weed seeds, and pathogens. “We also want to get some of the heat energy out so the worms aren’t cooked when they start the process,” adds Chambers.The worms are fed cooled-down compost twice a week in 12 continuous-flow composting beds. Each of the beds are 80 feet long and measure five feet across. Then the worms do the dirty work.
Chambers estimates that there are between 10 and 12 million worms working on his farm on any given day. After their work is done, a blade slices off the finished compost from the bottom of the rows. “We might slice a couple worms, but most are in the top six inches of the bed because that’s where the food is,” explains Chambers.
Every so often, worms themselves are harvested for sale. That’s when Chambers’ crew bring out the “worm separator,” a giant rotating disc that pushes both worms and compost through a long rotating screen. The heavier material goes into a wheelbarrow and the worms are screened out and fall into a waiting bucket. “They look like spaghetti,” he says, and adds “we make sure that they are clean when we sell them, so that when our customers buy two pounds of worms, they get worms and not soil.”
Lots of folks buy Chambers’ worm compost, from high-end Napa Valley wineries to celebrities with names like Oprah and Martha. Alternatively, you can grow your own “black gold” in your backyard or apartment. To be master of your own worm farm, round up some simple materials and some red, wiggly employees, and get to it.
What You Need:
- Worms: Eisenia fetida, are the most common type of worm used for vermicomposting. These worms are sold by the pound at many gardening centers or bait shops. You don’t need a lot to start a home worm bin. One pound of these guys is equivalent to 1,000 worms. They reproduce like crazy and regulate their number based on the amount of food available.
- Two plastic bins: We used 18 plastic storage bins with snap on lids. The box you use needs to be at least 12” deep. Make sure they’re opaque. Worms like it dark.
- A drill
- A small flowerpot or a brick
- Some old newspapers and household food waste
Putting it all together is easy. Master Vermicomposter Meghan Elliot shows you how:
1. Mark out holes on one of the bins. Using a pencil, mark out a series of holes around all four sides of the top of the bin. Mark out about 20 holes in the bottom of the bin. Leave the other bin blank. Take one of the lids and mark out enough holes so that the bin will get some air exchange. We made our hole pattern for the lid in the shape of a worm.
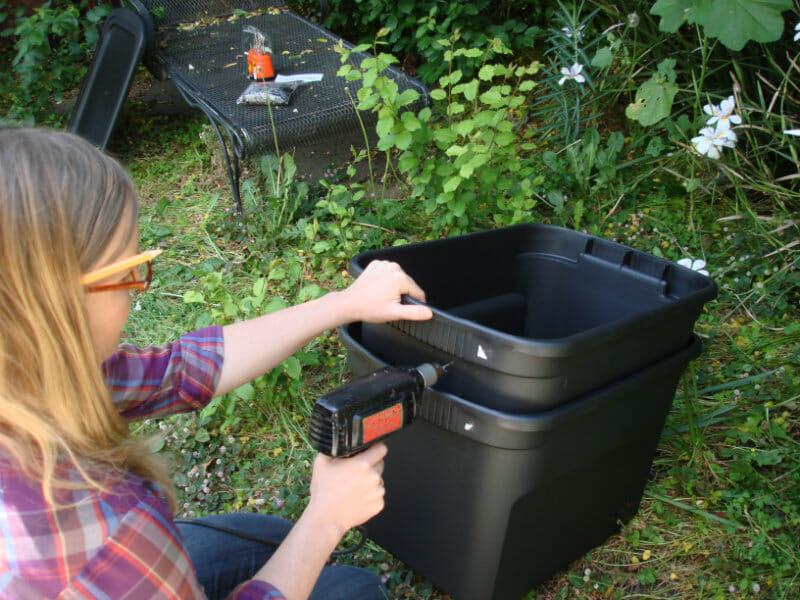
2. Drill out the holes. For the lid and sides we used a 3/32” drill bit. For the bottom holes, we used a larger 3/16” bit.
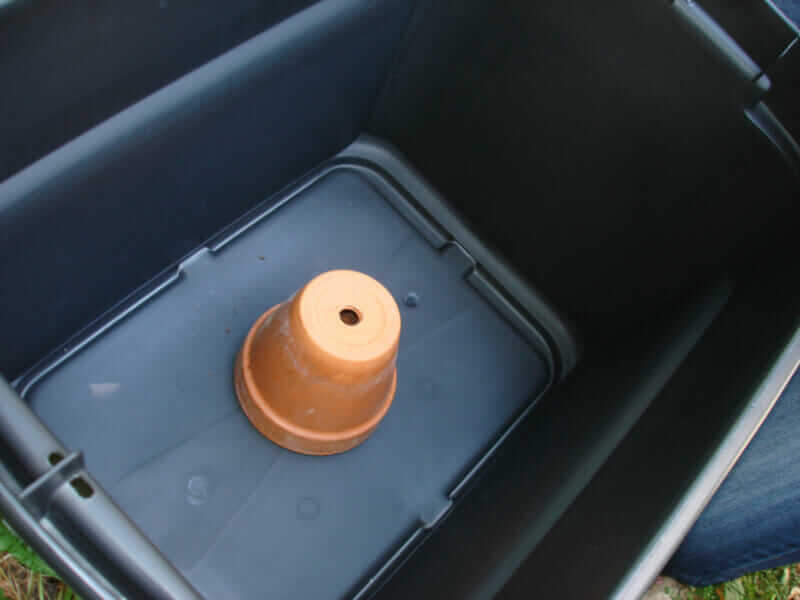
3. Stack your bins. Put a brick or flowerpot in the undrilled bin and stack the drilled bin on top. This allows some space for the liquid to drain out of the top bin into the bottom one.
4. Prepare the bedding. Elliot says that the bedding materials are like “browns” in garden compost. Shredded newspapers work great, as does torn up corrugated cardboard. A few dried leaves work too. Just avoid anything with glossy color printing or leaves with a lot of volatile oil or strong scent. Once your bedding is in place, wet it down until it’s the consistency of a wet sponge. It should be moist, but fluffy.
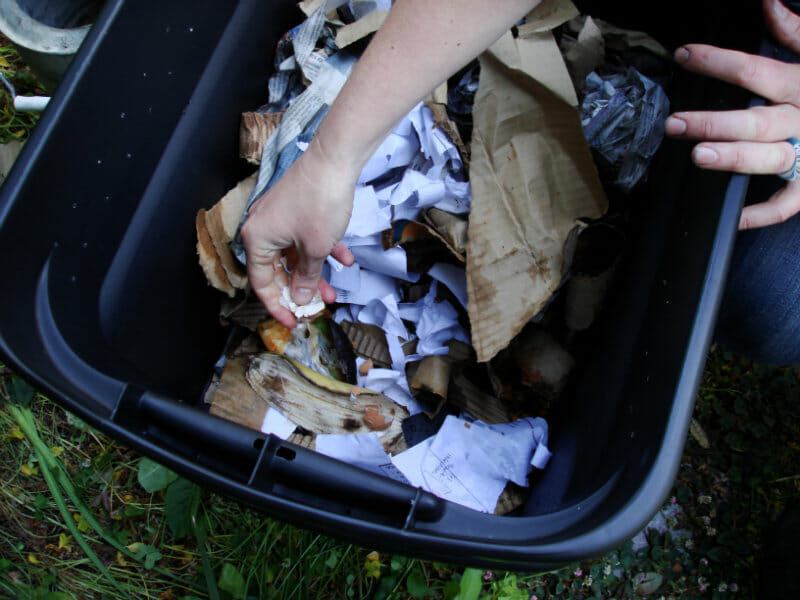
5. Lay out some worm food. Table scraps are the best. Just don’t add any oil or animal products like bone, meat or fat, or any dairy like butter or yoghurt. Citrus is okay, and Elliot says that the blue mold that naturally occurs on citrus peels is actually good and it inoculates your bin with beneficial substances that help your worms do their work. Just go moderately with acidic substances like citrus and coffee grounds. “Diversity is the key,” she explains.
6. Add the wigglers. Once your bin is all set, bury a small amount of food scraps and let your worms loose on it. Worms naturally go for the dark, so they’ll bury themselves in your table scraps. Don’t worry, they usually can’t find their way out of the bin and escape. They don’t want that anyway, and neither do you.
7. Tuck them in. To avoid fruit fly infestation, and worm escapees, take a few sheets of wet newspaper and lay them flat on top of your bedding. Then take a few more wet sheets and roll them up. Tuck them around the corners to form a seal so that everything stays in place and your worms are protected.
8. Put them to work. Don’t expect much in the first few weeks. They are getting over the trauma of a new home. Once they’re up to it, though, they can consume up to their own weight in food a day. So, if you put in roughly 1 pound of worms, try putting in just about a pound of scraps a day. Don’t worry if you put in too much or too little, just make sure you add a variety of food scraps, so that the little guys will have something to munch on. You can feed them every few days, or as infrequently as once every two weeks. Just make sure you replace the food that is disappearing. You’ll see that some foods break down quickly (like ripe fruit) and others take forever (like root veggies and cabbage). To avoid bad smells, bury your food scraps underneath some bedding and vary the location of the food throughout the box.
9. Harvest your worm compost. Once the worms have done their work, you will see vermicompost in the bin. It’s dark brown and looks like coffee grounds. To get some, without using fancy machinery, lure the worms to another area of the bin with fresh food. In a few days most of the worms will be working the new area, so you can carefully scoop out the finished compost. It’s okay if you have a few worms hanging on. Just make sure you leave most of them in the bin to keep working. You can also detach the top bin and pour out the “juice” that accumulates in the bottom bin. This stuff is like a high-energy drink for your plants. Dilute it or aerate it and feed your houseplants. And thank your employees.
Popular
i’m new in the cow farm having enough space to startup a worm house. i am starting this soon but may i know what should be the temprature for this house. imean what kind of temprature would fit for them to process it faster?
also, is there any way i can use my cow dung foe worm farm?
Cool but for me it didn’t work 🙁
three questions
1 how much does 1 lb cost
2 how much do you see your worms for.
3 how much do you sell your worm castings per pound for.
Thank you! I am starting a worm farm today!
Dan Hughes
How much do the worms cost? And how many
do you start with? Also how do you keep
them warm in winter outside? Merry Christmas! Robert! 12-22-2018 PS I live in Alabama
Begin to build my worm farm how to keep my farm in doors what do I need
I have a styrofoam container. I live in a single bedroom condo and would like to turn it into a small one bed that will hold at least 2 lb of worms for me that would be great because I do like to fish with worms but I don’t go often how do I go about making this container a worm bed is very thick like 3 in thick
I have a small styrofoam container about 3 in thick in about 18 in Long about 8 in wide. How do I turn that into a small mobile worm bed that I can take out of my apartment whenever I go fishing and just throw it in the truck I live in a single bedroom condominium
worm farm are amazing
worm farms are amazing